I recently had occasion to put horizontal lines into an OpenOffice.org Writer document. I discovered a couple of surprises.
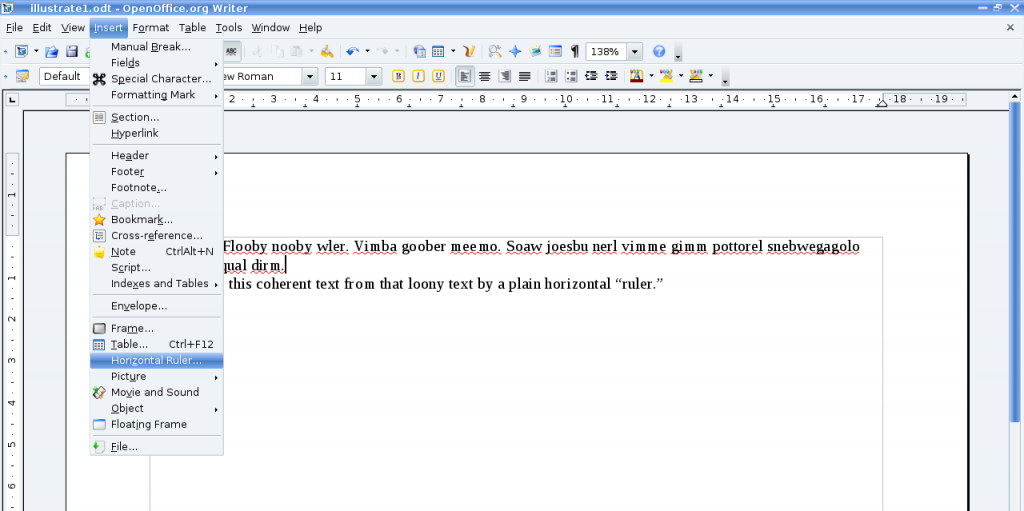
What I wished to do was insert a simple horizontal line across a page under a heading. As is my habit, I rummaged around in the menus looking for the feature I wanted. There is, indeed, something called “Horizontal Ruler…” in the Insert menu. Sounds good.
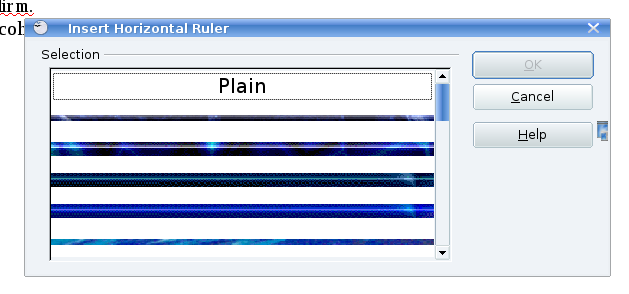
The first surprise lay here. The selection of available “rulers” that this option brings up is quite stunning. It’s a gallery of graphical horizontal rules straight out of 1990s websites. I’m pretty sure I had something like it on my first webpage in 1997. I’m talking flashy. And GIF-y. I have to concede, in the name of balanced reporting, that none of them had animated reflections or flaming torches at either end (and I must say, in my defence, that neither did anything on my 1997 webpage). Keeping to the task at hand, though: at the very top is a dotted outline with the word “Plain” inside.
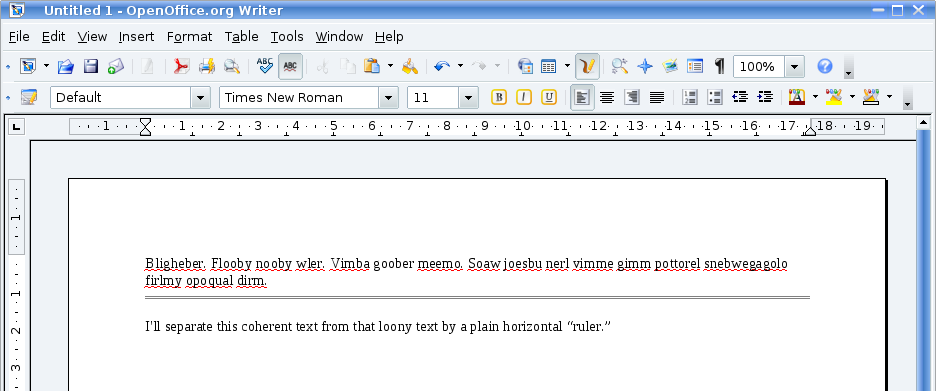
I went for “Plain.” This inserts a grey double line. I had envisioned a single black line, but I was trying to finish something before bed, so I decided not to worry too much. Relative to the other options, it was pretty dignified:
The behaviour of this double line was a bit baffling though. I didn’t seem to be able to select it by clicking on it. I couldn’t figure out how to get rid of it. Soon, I had had it with this “horizontal ruler” and I started searching for another way to insert a line. I did find one, in a sense, but more on that later. Luckily I eventually came across my second surprise on the OpenOffice.org users’ mailing list, which made some sense of the situation: the plain horizontal ruler is a paragraph with a bottom border.
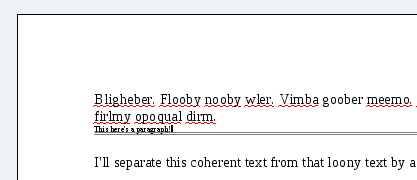
That’s right: you can’t grab it but you can type into it if you want. Understanding that you’re working with a paragraph is the key to accomplishing anything with this line. Under Format -> Paragraph (or by right-clicking on the line and choosing Paragraph), you can change the style, make it a single line, change the colour, put a border on any or all of the remaining three edges of the paragraph, adjust the width or the spacing above or below, or whatever. And to get rid of it is really easy. Put the text cursor on the first character of the line and hit backspace. Another method, if you have the formatting toolbar showing: with the cursor sitting on the line, select “Clear formatting.” If the Formatting toolbar isn’t showing you can do F11 or select Format -> Styles and Formatting and double-click on “Default.”
So stepping back one step, I was looking for another way to put in a horizontal line. I came across a shortcut on http://www.ooowiki.de/HelpOnRules, which I think is actually meant to be instructions for editing the wiki it’s on, but I didn’t realize it at the time and tried it out on Writer. Some of it works! Three hyphens, three equals signs, or three underscores in a row followed by a carriage return give instant lines of different styles. Incidentally, three plus signs give you a one-row, two-column table.
This is really neat. Now I can insert single or double horizontal rules into my documents without touching my mouse.
Too bad I really hardly ever need to do that.
I was disappointed at first to discover that these rules are paragraphs too. As time goes on, though, I relate less and less to my initial negative reaction toward this method of incorporating lines into a document. I guess it was to do with the fact that manipulating it was nonintuitive. It is really very frustrating if you’re hitting the <Enter> key to make some space above the rule and you’re getting more and more ruled lines instead.  Oddly, the “Plain Horizontal Rule” doesn’t do this; only the ones I made using the shortcuts. I haven’t figured out why.
Stepping sideways, you could also just draw your line using the line tool in the “Drawing” toolbar.
Stepping back more than one step, what about those graphical rulers? They do not behave like paragraphs. They’re graphics. And because (apparently) you can add your own graphics to the gallery, the graphical method is not as ludicrous as I first found it. I can imagine maybe using it for something tasteful: a nice literary-looking line with a fancy swirl in the middle to end a section or a paragraph of some really classy piece of writing. Or to add the appearance of class to some really crappy piece of writing.


