More on the Panasonic LX3 and Linux

Posted on

I’m getting some search engine referrals to do with the Panasonic DMC-LX3 and Linux since I wrote about my trepidation over upgrading the LX3’s firmware, and, well, I don’t have much up here on the topic.  I guess (but I may be wrong) that the main thing to talk about is how to get the pictures from your LX3 to your Linux box if you’re not using a card reader.  Is that uploading (from the camera), or downloading (to the computer)?  I’ve always thought of it as uploading, but that’s neither here nor there.

Uh, skip at least a paragraph from here if you’re interested in that topic without a lot of rambling in between.

Actually, it’s been my habit to just use a card reader <memory lane> since my Canon Powershot A40 and its 128MB CF card.  We had an aging Pentium II running Windows 95 and USB support was not great on Win95, but I found a Sandisk CF reader that worked with it.  It was not long after that that I bought my first ever computer (piece by piece) and didn’t feel like I had money left over for Microsoft, and thus came about my first rendezvous with Linux. </memory lane>

Man, do USB storage devices work better in Linux now than they did then!  And man, do the RAW files from the LX3 take up more space than the JPEGs from my 2-megapixel A40!  But those old pictures are still great and they really bring back the memories in vivid colour!

OK, so my point…oh yes, it was that I was always worried that a transfer would go wrong due to running out of battery power on the camera, so I always used a card reader.

However, I think that when I bought the LX3 I wasn’t aware that my multi-card reader didn’t do SDHC, and so I had to do at least one transfer directly from the camera.  And I remember having to try it a couple of ways to get it to work; I just don’t remember what I tried and what didn’t work.  However, for fun, and with the manual handy, I tried it again yesterday (having finally located the particular USB cable I needed for the LX3; I seem to have a dozen USB-to-mini-USB cables lying around and only a single teensy-tiny-ended one that fits this camera).

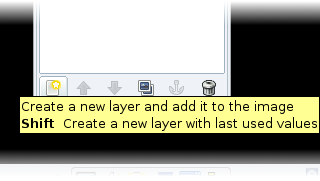
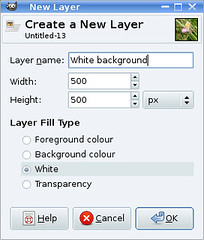
Jumping to the end, in case you’re here looking for actual information: it worked fine with the settings I had.  I’m guessing that the relevant one to find is USB MODE, on the fourth page of the SETUP menu (found by entering the menu starting in playback mode and selecting the wrench at the left-hand side):

USB mode option on LX3 in setup menu

I had PC selected, which worked for me.

lx3usbscreen2

Sorry for the distortion on the screenshots.  I took those with another camera.

I’m running Mandriva 2009.1 on this computer, but I’d guess (and hope) that as long as your distribution is reasonably new, it should handle the DMC-LX3 as a storage device just fine.

The play-by-play:

  1. I turned on the camera in playback mode.
  2. I plugged in the special tiny usb cable to the camera (OK, I also connected the other end to the computer).  The relevant connection is “AV OUT/DIGITAL” — the middle one — as illustrated in the manual (Page 113 in mine).
  3. The camera display read, first: “USB MODE;” then “CONNECTING TO PC;” then  “ACCESS;” then for the rest of the exercise it displayed just a zigzag arrow in a box.
  4. Mandriva noticed it was there and “LUMIX” came up in the device manager.  I opened up the file manager (Dolphin, but that’s not really relevant here).
  5. I copied my pictures.
  6. I unmounted (“safely removed”) the LUMIX device, then disconnected the cable from the camera.

This was a handy exercise for me, because there were images in the camera’s internal memory from months ago that I’d forgotten about, and I remembered them when I read the line in the manual: “Remove the card before using the pictures in the built-in memory.”  And now the built-in memory has space again for the next time I grab my camera to catch some moment and forget that the card’s still in the card reader!  I see in the manual that photos in the internal memory can be moved onto the SDHC card using the COPY option in the playback mode menu, so even if I can never find that USB cable again, I should always be able to use a card reader to get my photos onto the computer.

Photo editing with the GIMP: Rounded corners Part II

Posted on

Edit Dec 6, 2009: I have also done a demonstration of one way to make only one, two, or three corners round, in “GIMP: Combining selections.”  In it, I used the method of Part I to make a rounded selection, and then I added the desired square corners to the selection.

Before I get into the promised more-complicated-but-more-powerful way to make corners round on a photo using the GIMP, I should quickly demonstrate the really-least-complicated way.  It’s so simple, actually, that perhaps this is the post to read instead of Part I.

Under Filters -> Decor, in my version of the GIMP (2.6), there’s an option called Round Corners.  This option will be greyed out (unavailable) if your image already has an “alpha channel” (a channel containing transparency information).  If your image has an alpha channel and you still want to use this filter, you’ll want to remove it.

shot22

You just choose your parameters:

shot23

Whenever it’s an option, I like to make modifications to a copy, rather than the image I’m happy with thus far, so I keep “Work on copy” checked.  Here is the result of the parameters above on a 500×500 image:

shot24

The “radius” parameter in the Round Corners script is actually the radius, in pixels, of the curve used to round the corners, unlike the “radius” in the Rounded Rectangle selection script I talked about in Part I, which is the diameter of that curve, as a percentage of one side of the image.  Since I have a square image 500 pixels on a side, if I choose here 250 pixels as the radius I should get a circle. I may as well demonstrate that here, along with the fact that “Add background” gives you white corners instead of transparent ones:

shot25

Here’s my circle, on a white background:

shot26

The white is in its own layer below the image, so when you save you’ll most likely want/need to flatten the image or let the GIMP’s export function do it for you.  If you check the “Add drop-shadow” checkbox, the drop shadow will go on its own layer too.

Just for fun, let’s add the default drop shadow to the 80-pixel-radius corners:

roundbutterflywithshadow

As is evident by now, this method is quicker and more versatile than the way I wrote about in Part I.  I still have my more complicated but sneakily powerful method to get a demonstration written about.

If my explanation doesn’t work for you, here’s the official documentation at Gimp.org:

Decor filters -> Round Corners (this is a lot more helpful than the entry on selecting a rounded rectangle)

GIMP Manual

In addition, I see there are actually quite a few rounded-corners tutorials already on the web so if you don’t like mine, a search for “gimp round corners” will get you lots of other options.

Photo editing with the GIMP: Rounded corners Part I

Posted on

roundedsquarebutterfly

Edit: This is not the first way I should have described, because it’s not the easiest way.  See Part II for the really, really easy way.  See Part III for using layer masks to do the same thing, but only if you’re interested in learning about layer masks, because rounded corners are incredibly fast and easy in the GIMP using the Round Corners filter.

Edit again, Dec 6 2009: I have also done a demonstration of one way to make only one, two, or three corners round, in “GIMP: Combining selections.”  In it, I used this method to make a rounded selection, and then I added the desired square corners to the selection.

If I insist that the GIMP is a good tool for manipulating digital photos, I should show it doing something, shouldn’t I?  Since I was recently interested in trying this, let’s do rounded corners. You may want to do this for effect on a photo, or maybe you’d like to make some round-edged web graphics.  There’s more than one way to accomplish the same effect, as is so often the case.  I’ll look at one method (“Rounded Rectangle”) with a couple of variations here, first in a long-winded fashion and then at the end, in point form.

Here’s a picture from my little butterfly-photographing spree this past summer.  I’ll go through how to make corners round on that.

squarebutterfly

As I learned back then, this butterfly is called a Gatekeeper.  It’s a little blurry.  Decided to flap its wings just as I wanted to take a picture.  Let’s not worry too much about that.  It won’t affect the corners, right?  Actually I kind of like the effect.

Here’s a screenshot of the image open in the GIMP.  I’m using it under Linux with KDE 4, but it runs under Windows and OSX, too.  It’s free.  I have my toolbox and tabs with settings and stuff over on the right, and the image gets its own window.  The layout is pretty configurable.  Everything that has a tab can have its own window, for example, so you can see it all at once (if you have the screen real estate).

shot01

Here’s a good place to demonstrate the right-click menu in the GIMP.  You can set your preferences so that there’s a menu bar along the top of the image window, but all the same options can be found by right-clicking anywhere on the image.  This brings up the main menu, and has the advantage that I don’t have to move my mouse up to the top of the window before clicking.  Just click with the right button wherever you are (as long as it’s on top of the image somewhere) and slide down to the menu item you want.  I find this a more natural movement and faster than using a menubar.

I should get down to the corner-rounding, shouldn’t I?  OK.  While I’ve got the menu open, I’ll choose Select -> Rounded rectangle.

shot02

This window pops up, asking how sharp the corners should be:

shot03

I choose 20%, and here’s what it gives me.  There are now round corners delineated by dotted lines (“marching ants”):

shot04

From what I can tell, “radius” and “percent” in the Rounded Rectangle dialog box actually mean “diameter of the circle segment used to make the corner” and “percentage of the length of the shorter side of the photo.” So if you have a square photo and set the “radius” to 100%, this makes the selection the biggest circle that will fit inside your image.  So 20% means that if you visualize a whole circle starting in the round corner, that circle is 1/5 the height of the photo.

The situation at this point is that we have an area of the photo selected that has corners shaved off of it.

You need to decide whether you want the corners to be transparent or not.  If you are saving as a jpeg without transparency, then you may want them to be white (or another colour) to blend in with a background.

If transparent, I think the easiest thing to do is hit Ctrl-C to copy that selection, and then Ctrl-Shift-V to paste it as a new image (or with the mouse, right-click anywhere on the image and select Edit -> Copy, then Edit -> Paste as -> New Image).  Then you get this:

shot05

At the corners you see a checkerboard pattern: that’s like the table the photo is sitting on. You can see it through the transparent pixels in the corners. Save your image in a format that preserves transparency, and you’re done.

If you want opaque corners, there are two easy ways I can think of.  Let’s assume you want them to be white.

Way one: Paint in the corners. With the ants still marching around the rounded corners, right-click on the image to get the menu out, and choose Select->Invert, which makes everything that was selected unselected, and vice versa.  So now just the corners are selected.  Use the bucket tool to fill all the corners with the colour you want.  Ta-daa!  Done.

Way two: Put a white layer below the photo. Take the image above, with the transparent corners, and add a layer to it, filled with white.  There’s a button to create a new layer at the bottom left of the layers tab (at the very bottom of the “Toolbox” window, in my case):

shot06c

A window pops up asking for some details about the new layer I want to create.  You can give your layers names.  I’ll call this one “White background.” I’ve got the radio button ticked for a layer pre-filled with white.  By default it’ll make the layer the same size as the photo layer.

shot07

The new layer will appear above the one that was there before.  I only want to see white where my photo layer is transparent (i.e. the corners) so I click on the White background layer in the Layers tab and pull it down so it’s at the bottom of the stack as below.  (Yes, the stack of two layers.  I couldn’t think of a less grandiose word.)

shot08c

The photo window now looks like this:

shot09

Done.  Save in any format you need.  If your format doesn’t support multiple layers, the GIMP will ask if you want to “export” the file as a flattened image, which is what you want to do.  And if you put the picture into a blog post:

roundedsquarebutterfly

Ta-daa.  A roundy-cornered photo.

To sum up:

1. Open your image

2. Choose Select -> Rounded rectangle.

3. Choose how sharp the corners should be.

Now, if you want transparent corners:

4. Hit Ctrl-C to copy that selection, and then Ctrl-Shift-V to paste it as a new image.

5. Save in a format that supports transparent pixels.  Done.

Or, if you want white corners, either:

4. Choose Select -> Invert so the corners are selected.

5. Fill in the corners with white using the paint bucket tool.

6. Save.  Done.

or (white corners method 2):

4. Hit Ctrl-C to copy that selection, and then Ctrl-Shift-V to paste it as a new image.

5. Create a new layer filled with white.

6. Put that layer below the photo layer.

7. Save (or export).  Done.

Believe it or not, I’m not done writing about round corners yet.  I’ll write another post on a different approach to rounding the corners that adds a layer of complexity, but also adds flexibility to expand your ambitions far, far beyond simply shaving off corners.

Update Nov 6: Here’s what the official documentation at Gimp.org says about this method of rounding corners:

Select -> Rounded Rectangle

…well, a lot of parts of the GIMP Manual are more detailed than that.  It’s worth checking out when you want to understand a feature.

“Select -> Rounded Rectangle