
Edit Dec 6, 2009: I have also done a demonstration of one way to make only one, two, or three corners round, in “GIMP: Combining selections.” In it, I used the method of Part I to make a rounded selection, and then I added the desired square corners to the selection.
Before I get into the promised more-complicated-but-more-powerful way to make corners round on a photo using the GIMP, I should quickly demonstrate the really-least-complicated way. It’s so simple, actually, that perhaps this is the post to read instead of Part I.
Under Filters -> Decor, in my version of the GIMP (2.6), there’s an option called Round Corners. This option will be greyed out (unavailable) if your image already has an “alpha channel” (a channel containing transparency information). If your image has an alpha channel and you still want to use this filter, you’ll want to remove it.

You just choose your parameters:
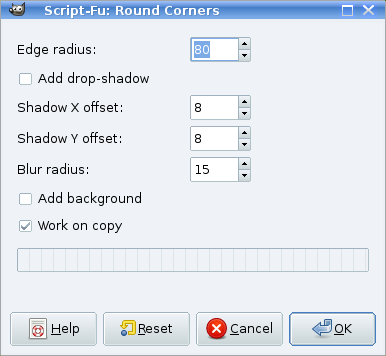
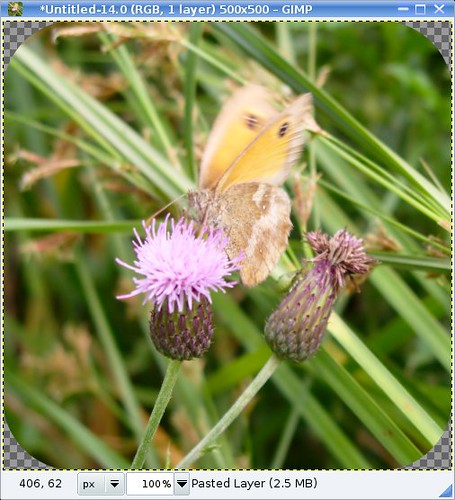
Whenever it’s an option, I like to make modifications to a copy, rather than the image I’m happy with thus far, so I keep “Work on copy” checked. Here is the result of the parameters above on a 500×500 image:
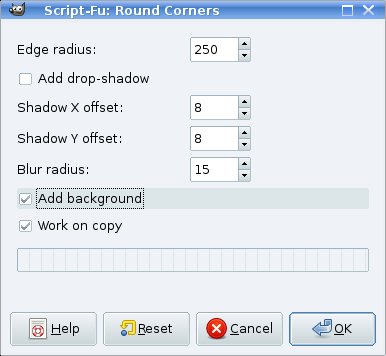
The “radius” parameter in the Round Corners script is actually the radius, in pixels, of the curve used to round the corners, unlike the “radius” in the Rounded Rectangle selection script I talked about in Part I, which is the diameter of that curve, as a percentage of one side of the image. Since I have a square image 500 pixels on a side, if I choose here 250 pixels as the radius I should get a circle. I may as well demonstrate that here, along with the fact that “Add background” gives you white corners instead of transparent ones:
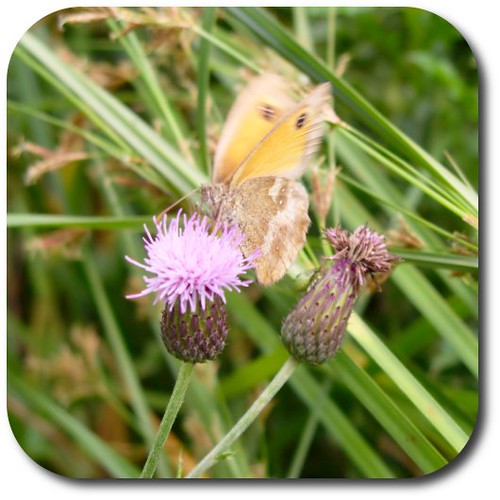
Here’s my circle, on a white background:

The white is in its own layer below the image, so when you save you’ll most likely want/need to flatten the image or let the GIMP’s export function do it for you. If you check the “Add drop-shadow” checkbox, the drop shadow will go on its own layer too.
Just for fun, let’s add the default drop shadow to the 80-pixel-radius corners:
As is evident by now, this method is quicker and more versatile than the way I wrote about in Part I. I still have my more complicated but sneakily powerful method to get a demonstration written about.
If my explanation doesn’t work for you, here’s the official documentation at Gimp.org:
Decor filters -> Round Corners (this is a lot more helpful than the entry on selecting a rounded rectangle)
In addition, I see there are actually quite a few rounded-corners tutorials already on the web so if you don’t like mine, a search for “gimp round corners” will get you lots of other options.