I’ve come across a few queries on the net about whether the GIMP has a “sponge tool like in Photoshop.” (for example, here, here, and here). I was going to say people seem to come away without a good answer, but it turns out the answer comes up occasionally, as it does in that last link. That’ll teach me to write the post and then research my references. Not. Anyway, it seems to me that this “sponge” tool is more or less a paintbrush in saturation adjustment mode.
I’ve never really wanted to do this, but having come across the idea, I’ve thought about it a little, and now played with it a little. Say you had a picture of a girl with a purple jacket on, and you’d like it to really stand out, more intensely than it does in your photo. This sounds like a job for a layer mask to me (funnily enough, so does any adjustment you want to apply to only part of your picture).
You’d just duplicate the image to a new layer, go to Colours->Hue-Saturation and slide the Saturation slider up until the jacket has as much punch as you think you want. Then you’d add a layer mask to that layer — say, all white so the super-saturated layer shows completely, and paint the mask black everywhere you didn’t want the extra saturation. Or start the mask black and paint in the jacket area with white or grey to start letting the saturation peep through. As long as you don’t enable “Show layer mask” in the layer’s right-click menu, it’s the effect of your brush on the saturation that you see, not the mask, so it feels just like painting saturation up or down with your brush.
I don’t have a photo that I can think of anything great to saturate or desaturate on, so my lame example will be to totally desaturate a part of an image.
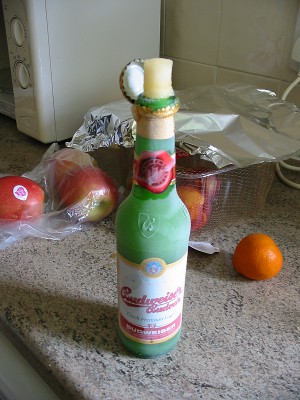
I started with a colour photo: this masterpiece of mine from the heady days of my youth, featured in a previous post.
One heady day of my youth? Nevermind. I started with an old photo from when I was more youthful than I am now.
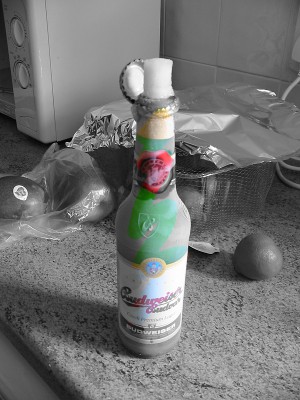
 I made a duplicate layer and desaturated it completely. That’s a bit heavy-handed, but I’m not going for a subtle work of art here.
Obviously, whether you’d adjust the duplicate layer’s saturation up or down to start with depends on the intended effect. You could go in both directions (up in some regions and down in others), using a more-saturated and a less-saturated duplicate, each with its own layer mask.
Aside: The GIMP gives you options to use lightness, luminosity, or an average of the two, to define the shades of grey in the image. I haven’t looked up exactly how the GIMP gets a greyscale value from the RGB in either case, but what you choose makes a significant difference so it’s worth previewing all the options. I usually land on luminosity as differentiating values in a reasonably intuitive way. There are more ways to make black-and-white out of colour images and they do give different results; there’s an interesting tutorial at www.gimp.org.
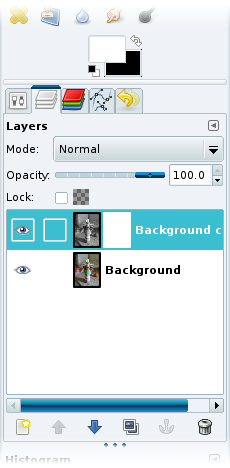
I started scribbling in black on the layer mask to let the colour show through from the layer below.
A little while later the layers dialogue looks like this:
Here’s the mask itself, next to the net result of the masked layer over the original photo:
At this point, if I wanted the background to be only moderately desaturated, I could slide the desaturated layer’s opacity down, and it would be done.
You can fine-tune the mask by painting or airbrushing in lighter and darker areas, knowing that any adjustments you want later won’t require undo-ing all the way back to where you made the original strokes — just lighten or darken the mask in that area to tweak the saturation up or down.
Now, you could also do the whole thing by putting a paintbrush or airbrush into Saturation mode and painting the saturation up or down by applying saturated or desaturated colours directly to the layer you’re working on.
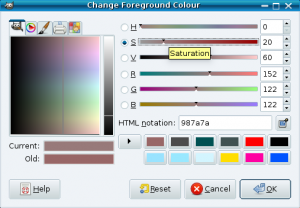
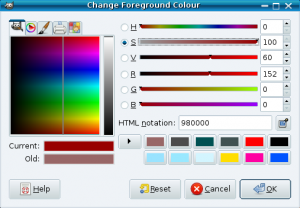
To set up the brush to increase saturation, you’d start by setting the foreground colour to something highly saturated. It doesn’t matter which colour, since the saturation is the only thing about it that will show on your picture. Here comes my super duper demonstration of doing that:
Open the Change Foreground Colour dialogue and slide the Saturation slider up to 100. Here comes my super duper demonstration of doing that:
If your foreground colour was black, this slider will pop back to zero when you’re not looking, so use something other than black. Now choose the paintbrush (or airbrush) tool and open the tool options tab. Set the mode to Saturation and the opacity to whatever amount you want it to apply on each stroke of the brush. Watch out though; if you set the opacity to 100% then the whole area you apply the brush to will go uniformly to the saturation of the colour you’re painting with, instead of a mix of that and the saturation that was there before. Since in a photo the saturation is likely to vary in the details of a region, this probably won’t look very natural.
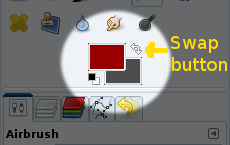
If you want to switch quickly between saturating and desaturating, set your foreground and background colours so one has 100% saturation and the other has 0%, then use the swap button to flip between them. I’ve included a handy picture at the right, of part of the Toolbox, with the foreground/background control cluster highlighted and an arrow pointing at the arrow that you use to swap foreground and background colours. Great diagram, eh? Carrying on…
Finally if you want to adjust the overall effect you can just slide the opacity of the whole saturation-adjusted layer up or down.
The only advantage I can see to this method, relative to the layer mask method, would be if you find it more intuitive to flip quickly back and forth between saturating and desaturating as you work. Even then, you might almost as well just switch between saturate and a desaturate layer as you work on the layer masks. If you’re using the airbrush, which gets more “opaque” the longer you “spray” with it, it can be very difficult to desaturate an area you’ve just saturated (or vice versa) exactly back to where it was before.

