First photo

Posted on

This is the first photo I took with my new Nikon D90.  I went straight for the 35mm f1.8 lens I’d bought with it and looked to see what kind of depth-of-field I could get.

I love how the guy’s head is in the dead centre of the frame.  This composition reflects how badly I wanted my first shot with a digital SLR to be in focus, and focused manually, with that manual focus ring I’ve craved for so long.  I made sure enough of the many possible settings were sensible, and made sure the focus was OK, and the subject was one I’ll remember fondly, and pushed the shutter release without recomposing.

There are enough things to get right on this camera that I don’t regret that decision.  There is scope to generate really embarrassingly screwed-up photos, and I have, but none of those are DSC_0001.

The subject, by the way, is one of several toys we bought at Mothercare in a panicked bid to ensure we had some new objects with which to divert the attention of a then-13-month-old G on an eight-hour overnight flight to Toronto.  None of the toys were relevant on that trip, as it turned out (hint: food was much more important).

This car has great, rubbery wheels that spin easily and drive straight.  G takes issue with the fact that it’s so stubborn about going in a straight line, but for me it’s a joy to roll around.  I even went back to buy another one (there were two models) but, alas, the cars were no longer available.

I’m pleased with this as the first frame in my “Camera4” database (“Camera” started in 2002, shots from a 2MP Canon Powershot A40 I thought was the best thing since pain de campagne…OK, I’m back from browsing old cycling-holiday shots…hey, F’s wearing the same cycling jersey right now as that younger guy in this photo from 2002…uh, what was I talking about?).

I was interested to see just how different the D90’s output would be to that of “Camera2”, a Powershot A700 (purchased mid-1996) and “Camera3,” a Panasonic DMC-LX3 (purchased late 2008), so I took a bunch more pictures of this same car.

I’m planning to post some of these, just because I can.  But not tonight.  I’m trying a new routine wherein I go to bed before it’s stupidly late and see if I’ll be more productive if I’m less tired.  Whoops.  Missed it again.

OpenOffice.Org horizontal rule revisited

Posted on


Ever since I wrote about my exciting adventures in inserting a horizontal rule into an OpenOffice.org Writer document, something has been bugging me: how could I, if I wanted to, add a graphical horizontal line to the rulers gallery?

I can see that if I go to the main gallery (“Tools -> Gallery” or the Gallery icon in the toolbar), and look under “Rulers,” I can browse the selection of graphics available under “Insert -> Horizontal Ruler…”.

As far as I can tell, there isn’t any way to add a graphic to “Rulers” though.  The graphics that are available on my installation are not particularly attractive to me.

Each one of the headings in the Gallery is a “Theme,” according to OpenOffice.org documentation, and the ones that come pre-populated don’t seem to be editable without going to the shared folder they live in, with administrator privileges, and adding files that way. In fact, I even tried that, and although the file was now in the folder, no new ruler became available in the Gallery.  I may have missed a crucial step, I suppose, so YMMV.  Also, I haven’t checked how all of this works under Windows; just Mandriva Linux running OOO 3.1.1.

Now although I can’t access my ruler with the “Insert->Horizontal Ruler…” menu dropdown, I can add an image to my own “theme” under “Tools->Gallery” using the “New Theme…” button, and after that, insert the image into my document by right-clicking on it in the Gallery and selecting “Insert->Copy”. I’m not sure this is any less trouble than doing “Insert->Picture->From File…” though.

It’s a good thing for me I haven’t yet come across a use for a graphical ruler.  A normal single or double line will do for me, so far, and I figured out how to get that a while back. More of a loss for me, in that light, may be that I actually felt compelled to spend time trying to figure this out.  There’s always the remote possibility this will be of use to someone else, though…

Traffic signs and road markings: Part II

Posted on

Moving on from signs that annoy me to ones that just make me smile…

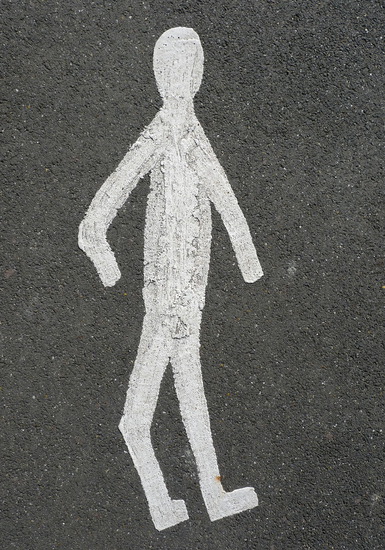
Around here they don’t seem to use a template for some of the road markings; they appear to be done freehand with a brush or roller.  This one means you can walk on this part of the pavement (and, accordingly, that people shouldn’t drive cars or bikes there).  As you can see, there’s a bit of artistic license employed.

This guy has groove in his stride.

This guy needs to stride a bit more often.

This guy, um.  Stopped in a hurry.

The bicycles are a similar story.  There’s no template.  Each bike is a hand-drawn original.  I find this interesting because so many people have no idea how a bicycle goes together and couldn’t draw one to save their lives. These road painters do, whether they like it or not.

You can see that most of the important elements of a bicycle are actually there.  Excepting that apparently some paint has chipped off this one, the bits are connected to the right other bits.  Things do get a little distorted.  Often the seatpost descends into the rear stays instead of the seat tube. They have to be a bit tall in accordance with the idea that you’ll be seeing it foreshortened as you approach.

This one is for people with really short arms.

You can discern the distinctive styles of different artists. By a coincidence, I discovered some newly-repainted ones glowing in the half-darkness on my own route not long after.  This one’s trademark is bikes for people with really long arms.  They stay in this style for quite a few repeats along here.  Some one guy had a lot of bicycles to draw before he could go home.